前记 上一章介绍完基本概念,这章将开始搭建服务。
主要从注册中心、发布服务、消费服务这几个方面开始。
Eureka Server 服务注册中心 为了方便搭建,这里直接使用 Idea 中的 Spring Initializr 构建。
流程:
先创建 Maven 主工程。 然后创建2个 Module,一个作为 server,一个作为 client。 这里先在 server 中进行操作。
添加依赖:
1 2 3 4 5 6 7 8 <dependencies > <dependency > <groupId > org.springframework.cloud</groupId > <artifactId > spring-cloud-starter-netflix-eureka-server</artifactId > </dependency > </dependencies >
添加注解 @EnableEurekaServer,使得 SpringBoot 应用成为服务注册中心:
1
2
3
4
5
6
7
8
@EnableEurekaServer @SpringBootApplication public class EurekaServerApplication { public static void main (String[] args) { SpringApplication.run(EurekaServerApplication.class, args); } }
在 application.properties 配置文件中写入:
1
2
3
4
5
6
7
8
9
10
11
12
# eureka server端口 server.port=7000 # eureka server的主机名 eureka.instance.hostname=localhost # 当前服务不需要到eureka server上注册(默认情况下server也是一个client) eureka.client.register-with-eureka=false eureka.client.fetch-registry=false # 供客户端注册的地址 eureka.client.service-url.defaultZone=http://localhost:${server.port}/eureka/
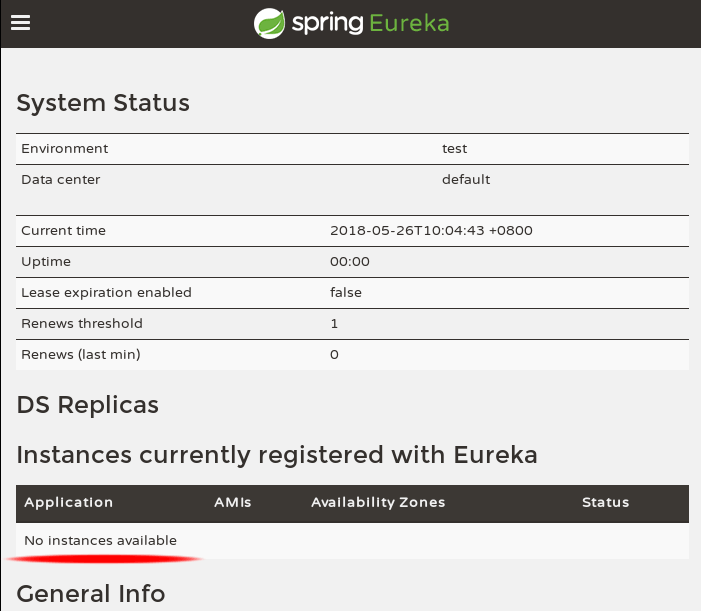
启动工程,打开 http://localhost:7000/ 即可进入 Eureka Server。
可以看到标红的地方显示没有发现任何服务。
Eureka Client 服务提供 现在创建一个可以提供计算服务的客户端,添加依赖:
1 2 3 4 5 6 7 8 9 10 11 12 13 <dependencies > <dependency > <groupId > org.springframework.cloud</groupId > <artifactId > spring-cloud-starter-netflix-eureka-client</artifactId > </dependency > <dependency > <groupId > org.springframework.boot</groupId > <artifactId > spring-boot-starter-web</artifactId > </dependency > </dependencies >
添加注解 @EnableDiscoveryClient 声明该应用是一个 Eureka Client。
1
2
3
4
5
6
7
8
@EnableDiscoveryClient @SpringBootApplication public class ComputeServiceApplication { public static void main (String[] args) { SpringApplication.run(ComputeServiceApplication.class, args); } }
在 application.properties 配置文件中写入:
1
2
3
4
5
6
7
# eureka client端口 server.port=8000 # 消费者将通过该名称调用所提供的服务 spring.application.name=computeService # 在server的上注册,这里在可以多个server注册 eureka.client.service-url.defaultZone=http://localhost:7000/eureka/
实现一个 RESTFul API 风格的 /add 接口,提供加法服务:
1
2
3
4
5
6
7
8
9
10
11
12
13
14
15
16
17
18
19
@RestController public class ComputeController { private final Logger logger = LoggerFactory.getLogger(ComputeController.class); @Resource private EurekaInstanceConfig eurekaInstanceConfig; @Value("${server.port}") private Integer serverPort; @GetMapping("/add") public String add (@RequestParam Integer a, @RequestParam Integer b) { Integer after = a + b; logger.info("/add, instanceId:{} , host:{} , result:{}" , eurekaInstanceConfig.getInstanceId(), eurekaInstanceConfig.getHostName(false ), after); return String.format("Result: %d, from port: %d" , after, serverPort); } }
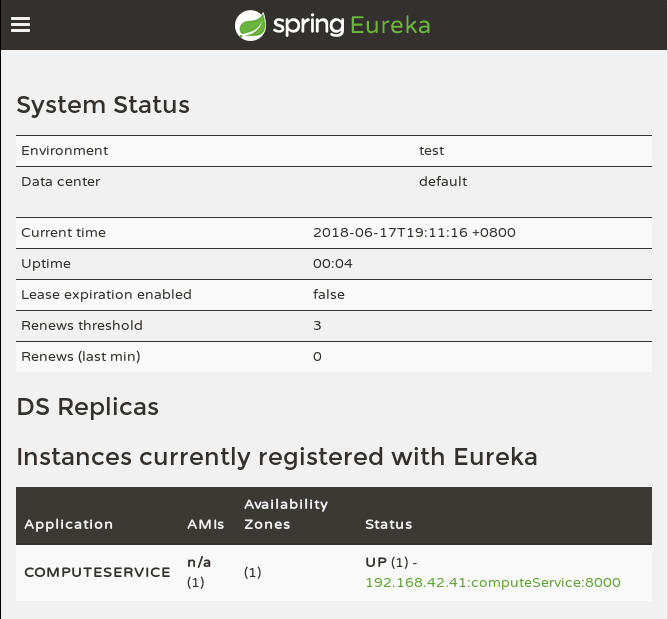
启动客户端,可以看到已经在 server 上注册:
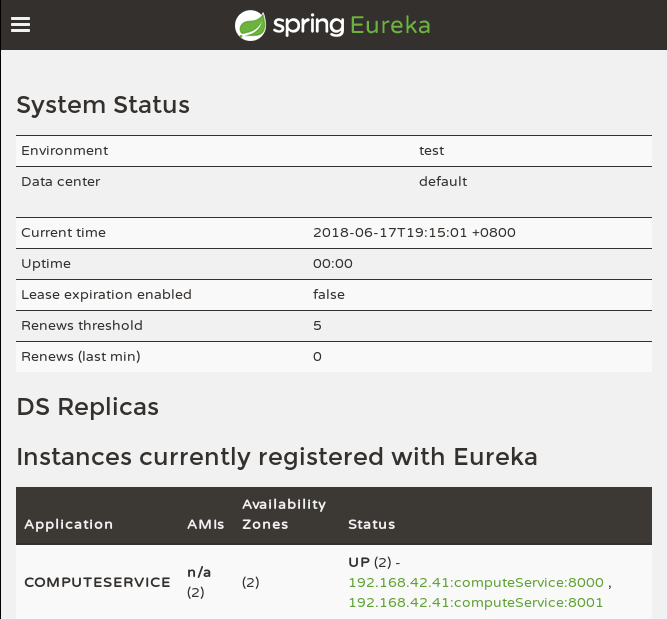
通过启动多个实例达到集群的目的(如何启动可以看这篇[文章]https://blog.csdn.net/forezp/article/details/76408139))
服务消费 上面已经完成了计算服务的注册,接下来是消费其提供出来的接口。
SpringCloud 有两种服务调用方式:
Ribbon + RestTemplate Feign Ribbon + RestTemplate 同样,添加一个服务消费的 Module,命名为 ribbonConsumer。
依赖:
1 2 3 4 5 6 7 8 9 10 11 12 13 14 15 16 17 <dependencies > <dependency > <groupId > org.springframework.cloud</groupId > <artifactId > spring-cloud-starter-netflix-eureka-client</artifactId > </dependency > <dependency > <groupId > org.springframework.cloud</groupId > <artifactId > spring-cloud-starter-netflix-ribbon</artifactId > </dependency > <dependency > <groupId > org.springframework.boot</groupId > <artifactId > spring-boot-starter-web</artifactId > </dependency > </dependencies >
添加注解 @EnableDiscoveryClient 使得消费者可以发现服务;添加 RestTemplate Bean:
1
2
3
4
5
6
7
8
9
10
11
12
13
14
15
@EnableDiscoveryClient @SpringBootApplication public class RibbonConsumerApplication { public static void main (String[] args) { SpringApplication.run(RibbonConsumerApplication.class, args); } @Bean @LoadBalanced RestTemplate restTemplate () { return new RestTemplate (); } }
在 application.properties 配置文件中写入:
1
2
3
4
5
6
7
# 消费者端口 server.port=9000 # 消费者名称 spring.application.name=ribbonConsumer # 和客户端一样,这里可以在多个server注册 eureka.client.service-url.defaultZone=http://localhost:7000/eureka/
创建接口,去消费 COMPUTESERVICE 提供的 add 服务:
1
2
3
4
5
6
7
8
9
@Service public class RibbonComputeService { @Resource private RestTemplate restTemplate; public String add (Integer a, Integer b) { return restTemplate.getForEntity("http://COMPUTESERVICE/add?a=" + a + "&b=" + b, String.class).getBody(); } }
控制器:
1
2
3
4
5
6
7
8
9
10
11
@RestController public class RibbonConsumerController { @Resource private RibbonComputeService computeService; @GetMapping("/add") public String add (@RequestParam Integer a, @RequestParam Integer b) { return computeService.add(a, b); } }
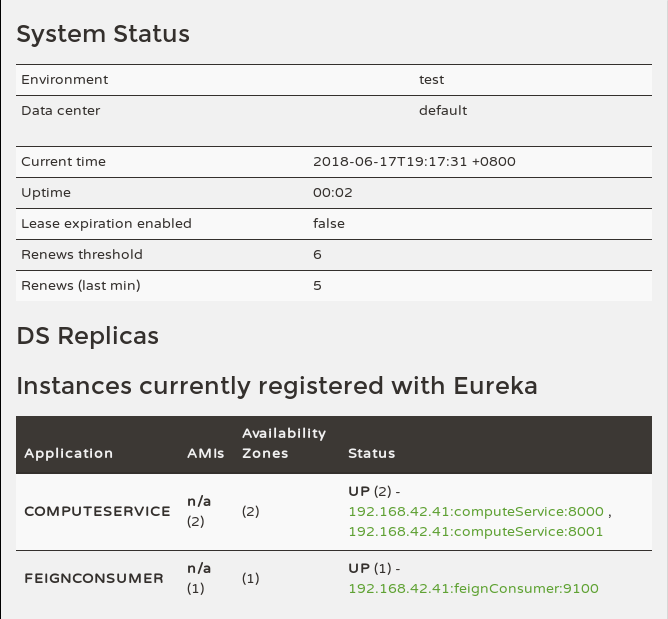
然后启动消费者,可以看到都注册上了:
访问多几次消费者的网址 http://localhost:9000/add:
1
2
3
4
5
6
7
8
9
10
11
$ curl http://localhost:9000/add\?a\=1\&b\=66 Result: 67, from port: 8001 $ curl http://localhost:9000/add\?a\=1\&b\=45 Result: 46, from port: 8000 $ curl http://localhost:9000/add\?a\=1\&b\=100 Result: 101, from port: 8001 $ curl http://localhost:9000/add\?a\=1\&b\=81 Result: 82, from port: 8000
可以看到两个 compute-service 客户端被交替调用。这是 Ribbon 在客户端已经实现了对服务调用的均衡负载。
一个服务注册中心 Eureka Server 端口为7000 Client 跑了两个实例,端口分别为 8000、8001 分别向服务注册中心注册 Consumer 端口为9000,向服务注册中心注册 当 Consumer 通过 RestTemplate 调用 Client 的 add 接口时,因为用 Ribbon 进行了负载均衡,会轮流的调用 Client:8000、8001 两个端口的 add 接口 Feign Feign 基于接口的注解请求 Feign 整合了 Ribbon 添加新的 Module,命名为 feignConsumer,添加依赖:
1 2 3 4 5 6 7 8 9 10 11 12 13 14 15 16 17 18 <dependencies > <dependency > <groupId > org.springframework.cloud</groupId > <artifactId > spring-cloud-starter-netflix-eureka-client</artifactId > </dependency > <dependency > <groupId > org.springframework.cloud</groupId > <artifactId > spring-cloud-starter-feign</artifactId > <version > 1.4.4.RELEASE</version > </dependency > <dependency > <groupId > org.springframework.boot</groupId > <artifactId > spring-boot-starter-web</artifactId > </dependency > </dependencies >
因为整合了 Ribbon,所以主程序中只需要注解 @EnableFeignClients 即可:
1
2
3
4
5
6
7
8
9
@EnableFeignClients @EnableDiscoveryClient @SpringBootApplication public class FeignConsumerApplication { public static void main (String[] args) { SpringApplication.run(FeignConsumerApplication.class, args); } }
配置文件 application.properties 和上面的差不多:
1
2
3
4
5
6
7
server.port=9100 spring.application.name=feignConsumer eureka.client.service-url.defaultZone=http://localhost:7000/eureka/ feign.hystrix.enabled=true
定义消费的接口:
1 2 3 4 5 6 7 @FeignClient(value = "computeService") public interface FeignComputeService { @GetMapping("/add") String add (@RequestParam(value = "a") Integer a, @RequestParam(value = "b") Integer b) ; }
控制器:
1
2
3
4
5
6
7
8
9
10
11
@RestController public class FeignConsumerController { @Resource private FeignComputeService computeService; @GetMapping("/add") public String add (@RequestParam Integer a, @RequestParam Integer b) { return computeService.add(a, b); } }
同样,像上面那样启动多个客户端后进行测试。
1
2
3
4
5
6
7
8
9
10
11
$ curl http://localhost:9100/add\?a\=1\&b\=66 Result: 67, from port: 8001 $ curl http://localhost:9100/add\?a\=1\&b\=45 Result: 46, from port: 8000 $ curl http://localhost:9100/add\?a\=1\&b\=100 Result: 101, from port: 8001 $ curl http://localhost:9100/add\?a\=1\&b\=81 Result: 82, from port: 8000
结果和 Ribbon 一样,对服务提供方 client 实现了负载均衡。
参考:spring-cloud-feign


